How to Install/Test Postman for CCNA Deep Dive Courses
What is Postman?
Postman (www.postman.com) describes its primary product – Postman – as the “Collaboration Platform for API Development”. For newbies to development, particularly for networkers who may be in their initial phases of learning about automation and programming, that claim may make little sense until you build skills. It can help then to think about any automation app in its basic components:
- Local data known to the host where the application runs.
- Remote data and code that exists on another host, accessible through an API.
- Programming code (logic) that acts on both the local data and data extracted from an API.
Postman may the the most popular app to aid developers in developing API calls, with their website claiming over 10 million developers using the product. For instance, if you use any labs at Cisco DevNet (developer.cisco.com), you will use Postman as the primary tool for experiencing APIs when not using them directly from an application.
In the CCNA Deep Dive automation course, you will use Postman, plus several websites, to perform labs. For the websites, you do not need to do anything prior to class. For Postman, it helps to install the application before class begins.
Download and Install Postman
Postman allows for unlimited use with a free download, but like many apps, you can choose to use paid features as well. For the purposes of the course, download the app and set-up a login at Postman.com – but you can choose the free account option.
- Navigate to www.postman.com
- Click the download link
- Choose the version of the app for your OS (supported on Windows, Mac, Linux)
- Once downloaded, find the downloaded file and install as normal for your OS
Create a Free Account at Postman.com
The Postman app will require you to login when you start the app. Note that logging in helps you if you use Postman beyond the class. Using a login lets you synchronize your Postman work between your various devices. It also lets you access that same work from Postman.com. Take a few moments to go ahead and setup your username and password for Postman.
- Navigate to www.postman.com
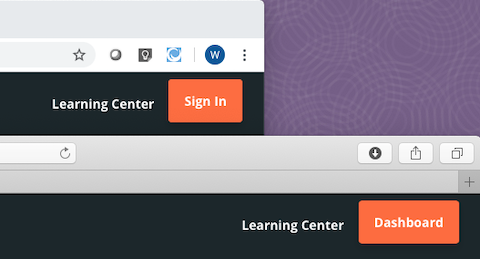
- Look in the upper right of the home page. You should see either:
- A Dashboard button – meaning you already have a login, and your browser logged you in already.
- A Sign In button – meaning you have not logged in, or possibly do not have a login yet.
- Click Sign In, and follow the steps to create a free login.
- Now click the Dashboard button to see a web version of Postman.
- Note your username and password so that once you start the Postman desktop app, use that login info to login from the app.
Import a Postman Collection
Postman organizes API calls – requests – into collections. You should think of a collection as a set of related API calls for some task. You might then create multiple collections, each with multiple API requests, as shown in the next figure.
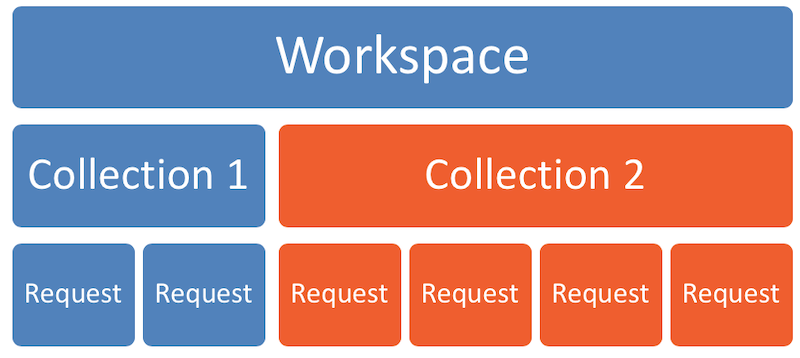
Figure 2: Postman Workspace and Collection Organization
Postman also create an additional hierarchy as well: Workspaces. You can use the default workspace – “My Workspace” – while getting started. Over time, you may want to create separate workspaces for different projects. As shown in the figure, you could have one workspace for a project, with multiple collections, with different requests in each collection.
Postman has a large number of collaboration tools. For the purposes of the class, you will use the import feature. Before class, we exported some Postman Collections. You can then import a collection and then use the collection. On this page, you will test that process by downloading a collection that contains a single request, just to test the process.
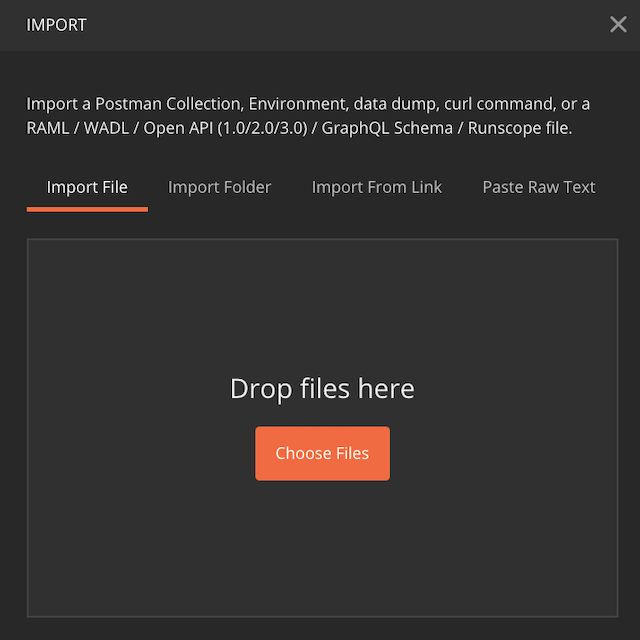
Figure 2: Postman Import Window
- From the Postman app, look at the upper left corner, and click the “Import” button. A new window like Figure 2 appears in the app:
- Follow these steps to import the collection:
- From this page, copy this URL: https://www.getpostman.com/collections/346f53e7868c148ed504
- From the Postman app, in the import window, click on “Import from Link”
- Paste the link you copied into the window and click the “import” button
Test the Collection to Ensure You are Ready for Class
As a final step, test whether you can use the collection using a few steps. The class will show how to take these steps, but note that you will repeatedly use these same steps in different collections in class. The process follows the numbered steps in this figure:
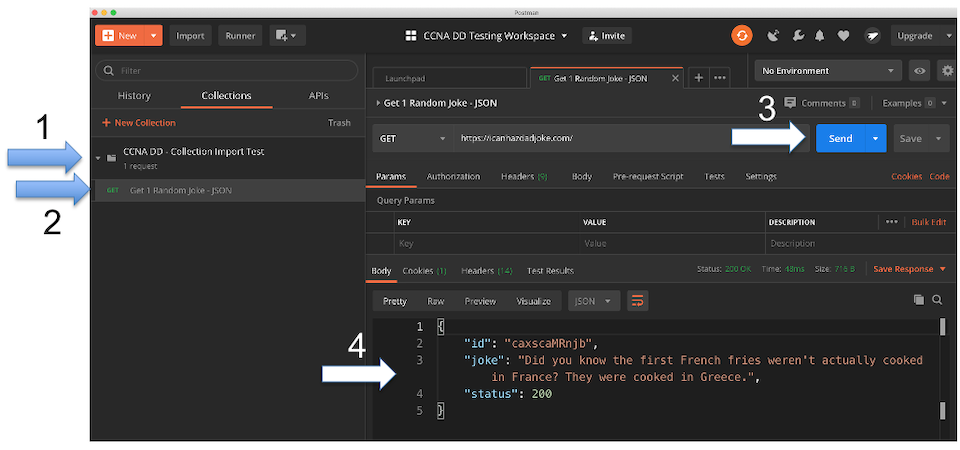
Figure 3: Four Steps to Use and See Results of a REST Request
- Look to the left side of the UI to see the collection listed by name: CCNA DD – Collection Import Test. Click the name to expand the collection to show it’s one request.
- Still looking to the left, click on the one request listed. Doing so should make the request’s details appear on the right.
- On the right, click the “Send” button to send the request.
- On the bottom right, look for the response data, which should include a Dad joke.
If you can work through the first three steps, you are ready for class. If for some reason you have issues with the fourth step, do not be concerned; we can work through it in class.